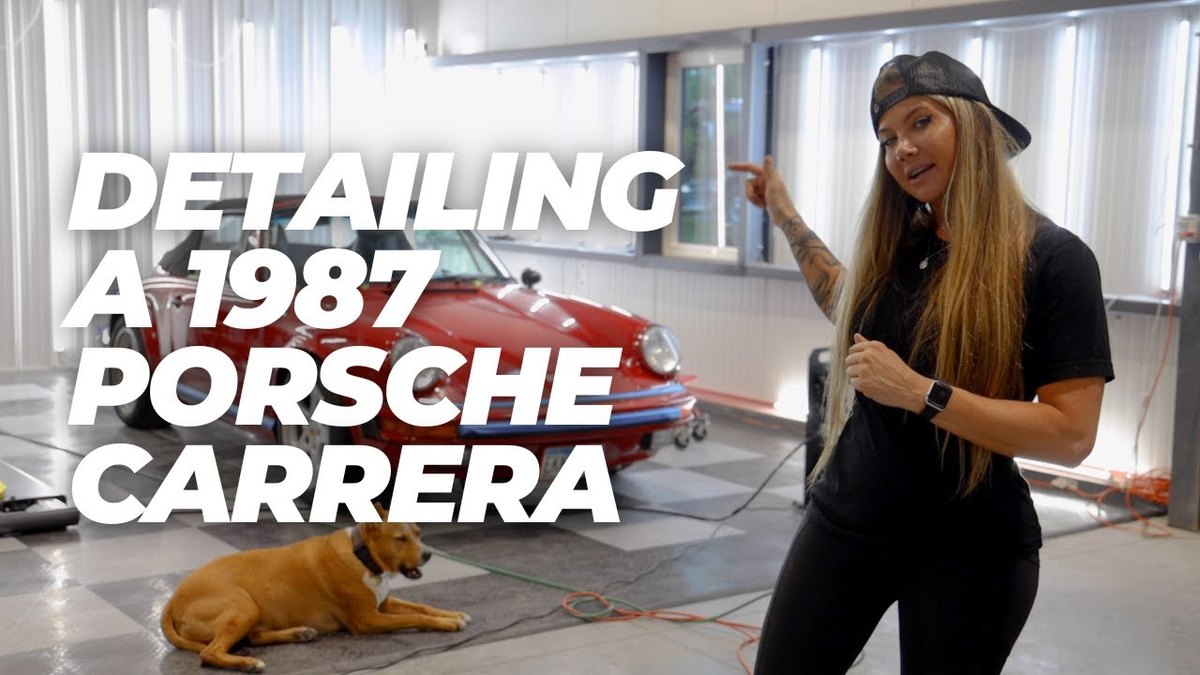
Detailing a 1987 Porsche 911 Carrera Cabriolet: Paint Correction and Ceramic Coating
I’m Jen, a professional detailer here in Boerne, Texas. Every so often a car rolls into the shop that has never really been detailed the right way, and this 1987 Porsche 911 Carrera Cabriolet was exactly that. Parts of it had never been touched, the paint was full of defects, and the convertible top needed real attention. The owner came in asking about a ceramic coating, and what it actually needed was a full detail to earn that coating first.
Here is how we transformed this Carrera from start to finish, why each step mattered on a car this age, and what you can learn from it if you own a classic or a soft top of your own.
Watch the Full 1987 Porsche Carrera Detail
Before we break it down, here is the full walkthrough of the detail from the shop. It is a great look at how a neglected classic comes back to life stage by stage.
Quick Answer: What Did This 1987 Porsche Carrera Detail Involve?
This 1987 Porsche 911 Carrera Cabriolet received a light clay bar to remove bonded contamination, a convertible top cleaning followed by fabric protection, a full paint correction to remove scratches and restore a mirror finish, and a ceramic coating applied over the corrected paint. The car had been repainted in a base color with a clear coat on top, so the paint was carefully preserved and protected rather than stripped, with about 20 hours of work from start to finish.
Why This Carrera Needed More Than a Wash
You could tell right away this car had not been detailed in a very long time. The exterior was covered in defects, and the paint had scratches throughout. When I ran my hand across the surface it felt like a cat’s tongue, which is the classic sign of bonded contamination sitting on top of the clear coat.
That rough texture is not just cosmetic. Those bonded contaminants and scratches trap dirt, dull the finish, and will sit under any coating you apply, so the surface has to be corrected and decontaminated first. Skipping that step is the number one reason a ceramic coating disappoints people. If you are wondering whether your own car is at that stage, here are the signs your car needs paint correction.
Step One: A Light Clay Bar to Decontaminate the Paint
Because the surface felt so rough, we started with a light clay bar. Claying gently pulls the bonded contamination off the clear coat that a normal wash leaves behind, so the paint goes from feeling gritty to glass smooth. That smooth base is what lets the polishing and the coating do their job properly.
On a delicate older finish you use plenty of lubrication and a light touch, which is exactly how we approached this Porsche. It is a simple step, but on a car that has gone years without it, the difference you feel afterward is dramatic.
Caring for the Convertible Top the Right Way
A soft top is its own project and it is easy to ruin if you rush it. I sprayed a dedicated convertible top cleaner onto the fabric, worked it in with a light brush, rinsed it thoroughly, cleaned the underside, and dried it off. Only then did the car move over for correction.
Before any polishing began, we taped off the rubber trim and the edges of the top. That is a step people skip and regret. If a buffer or polishing compound touches the convertible top fabric or the rubber seals, the product gets ground into the material and it is a headache to remove. A few minutes of taping protects the whole top.
Protecting the Fabric Top With Gtechniq Smart Fabric
Once the top was clean and dry, we applied Gtechniq Smart Fabric to protect it. I make sure every bit of dust and hair is off the top first, then work the product down into the fibers so it bonds properly.
The reason I reach for this product over others is simple. It does not streak when you apply it, and it works the first time, which is not something you can say about every fabric guard. On a convertible you actually want protection that repels water and stains without changing how the top looks or breathes. If you want the deeper breakdown, here is our Gtechniq Smart Fabric review for convertible top protection.
Paint Correction to a Mirror Finish
With the top handled and the trim taped, we moved into the paint correction. This is where the scratches and dullness get machined out and the true depth of the paint comes back. The goal on this car was a clean mirror finish that felt silky smooth to the touch, the kind of result that makes a long neglected classic look cared for again.
Paint correction is a real skill, especially on an older repainted finish where you do not always know how much clear you have to work with. You take it in stages, check your work under proper lighting, and refine until the marks are gone. For a full explanation of the process, see what paint correction actually is, or learn about our professional paint correction in Boerne and San Antonio.
Working With a Repainted Base and Clear Finish
When the owner came in, he mentioned the car had been repainted at some point, and it had been done in a base color with a clear coat on top rather than the single stage paint these cars originally wore. That distinction matters. Single stage is where the color and the clear are mixed together into one layer, while a base and clear system lays the color down first and then a separate clear coat over it.
Because this repaint had a clear coat, we had a layer to safely correct and polish, so the plan was to preserve that paint, perfect it, and lock it in with a coating rather than doing anything aggressive. If you are curious how to spot a repaint on any car, we wrote a whole guide on how to tell if a car has been repainted.
Sealing It All In With a Ceramic Coating
With the paint corrected and clean, the final step was the ceramic coating the owner originally asked about. Applied over freshly corrected paint, a coating adds a slick, hydrophobic layer that makes the car easier to wash, helps it stay cleaner between washes, and protects that hard won finish going forward.
This is the right order every time. Correct the paint, then coat it. Coating over a scratched, contaminated surface just locks the defects in, which is why the decontamination and correction came first. You can explore our full ceramic coating services if you want this level of protection on your own car.
About 20 Hours of Work, Start to Finish
All in, this Carrera took around 20 hours from start to finish. That is what a proper detail on a neglected classic looks like. It is not a quick wash and wax, it is decontamination, careful correction, dedicated soft top care, fabric protection, and a coating, each step done in the right order.
The result was worth every hour. The paint came back to a deep, smooth mirror finish, the top was clean and protected, and the whole car was sealed and ready to enjoy. That is exactly the kind of transformation these older Porsches deserve.
Trust Your Classic to Carsmotology
If you own a classic, an exotic, or a convertible that needs this kind of careful attention, this is what we do every day. We serve Boerne, San Antonio, New Braunfels, and the surrounding Texas Hill Country, and we treat every car like it is our own.
Frequently Asked Questions
Can you ceramic coat a car that has been repainted?
Yes. As long as the repaint is fully cured and in good condition, a ceramic coating can be applied over it. On this Porsche the repaint used a base color with a clear coat, which gave us a clear layer to safely correct and polish before coating. The key is decontaminating and correcting the surface first so the coating bonds to clean, defect free paint.
Why does a car need a clay bar before ceramic coating?
A clay bar removes bonded contamination that a normal wash leaves behind, the gritty feel that makes paint feel like a cat’s tongue. If you coat over that contamination, you seal the roughness and defects in underneath the coating. Claying gives you a glass smooth surface so the correction and the coating both perform the way they should.
How do you protect a convertible top when detailing?
Start by cleaning the fabric with a dedicated convertible top cleaner and a light brush, then rinse and dry it fully. Tape off the top and the surrounding rubber before any machine polishing so a buffer never touches the fabric. Finish by applying a quality fabric protectant like Gtechniq Smart Fabric worked into the fibers, which repels water and stains without changing the look of the top.
What is the difference between single stage and base coat clear coat paint?
Single stage paint mixes the color and the clear into one layer, which is what many older cars like this 1987 Porsche originally wore from the factory. A base coat clear coat system lays the color down first and then a separate clear coat on top. The clear coat version gives you a protective layer to correct and polish, while single stage paint requires a more careful approach since you are working the color layer directly.
How long does it take to detail a classic car like this?
A full detail on a neglected classic can easily take around 20 hours, as it did on this Carrera. That time covers decontamination, a full paint correction, dedicated convertible top cleaning and protection, and the ceramic coating. A proper transformation is not a quick job, and the extra hours are what separate a lasting result from a surface level shine.